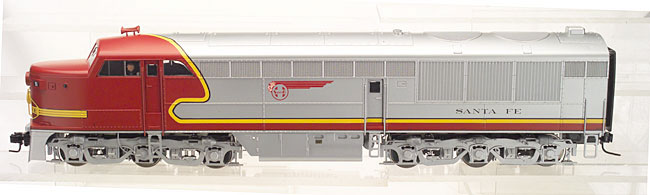
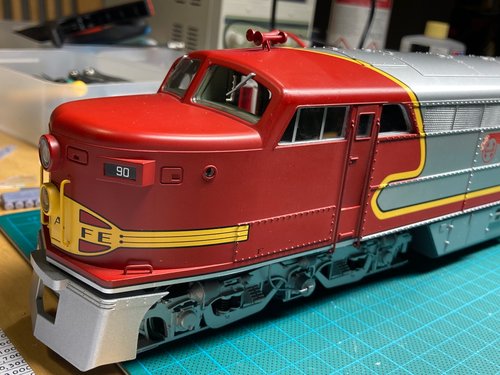
The Fairbanks Morse Erie Built locomotives are around since 2003. The tooling is nice and I really wanted to run a set on my future layout. This is also the perfect test field of how to convert diesel locomotives to Proto:48. A couple of changes have to be made to turn these high rail racers into performing scale models.
Right 'O' Way Wheels
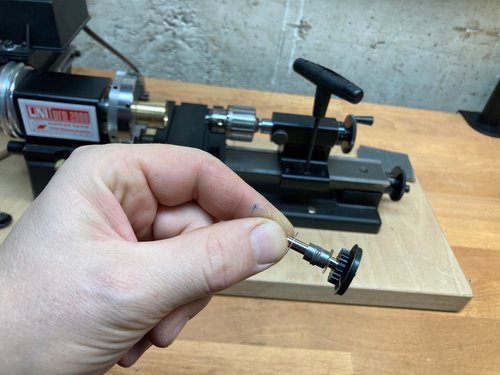
The key to converting these elegant locomotives to Proto:48 is to get high quality steel wheels. These 40″ diesel wheels are available at Jay Criswell’s fine model shop:
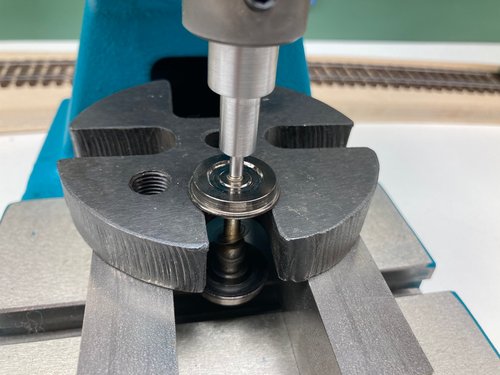
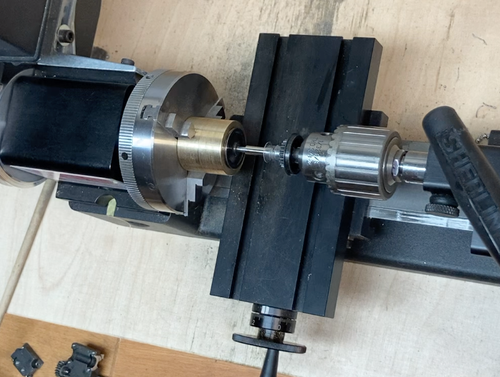
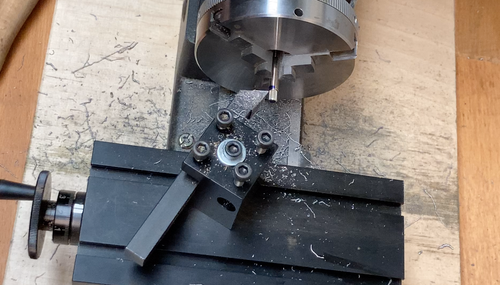
Togehter with the Sherline precision lathe and the original axles this operation is not too difficult.
The Atlas "China Drive"
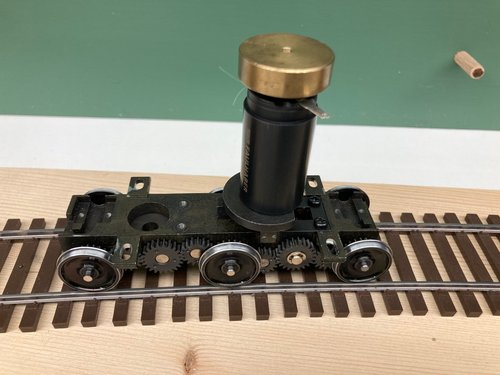
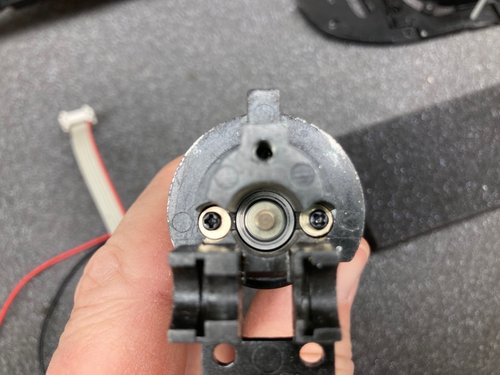
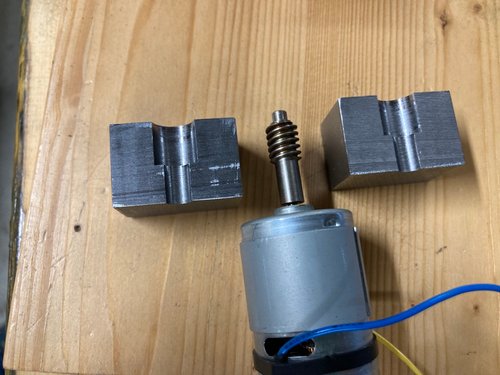
Often I’ve read bad things about this drive mechanism where the motor sits on top of each truck. I must say that the drive is not bad at all. Of course there are much finer mechanisms out there like those of Overland or Sunset but the Atlas machine is well proven on rough 3-rail track and hours of continous running. The problem that I have here is the motors. They are of the lowest grade and draw 1.3 Amps of current befor the wheels start spinning. Performance is low. So they have to go. I have already built the tools to press the flywheels and worm gears off the motor shafts. I will replace them with Faulhaber hight end motors to ensure a low starting speed and general a constant handling.
Can it be done?
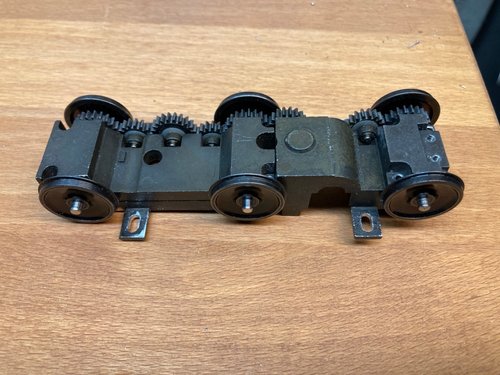
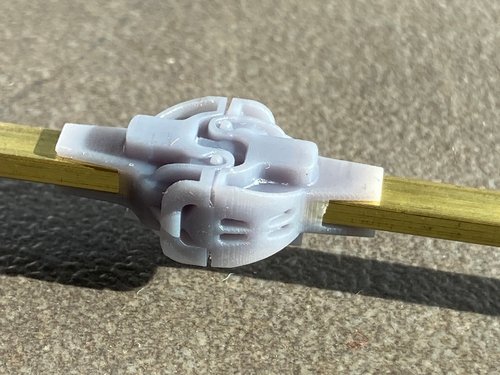
The wheelbase of these six wheel trucks is rather long and so it was not clear how difficult a conversion would be. The flnages of P:48 are rather tiny and a derailment could easily occur on rough track. Usually I would implement a horizontal sping loading of the axles to avoid problems but in this case Atlas has already taken care of it. The center axle sits a tiny bit higher than the outer axles. on completely level track only the first and third sets of drivers do have contact to the rails . As far as I can tell by now this feature is really helpful and minimizes the necessary work load.
Can it be done?
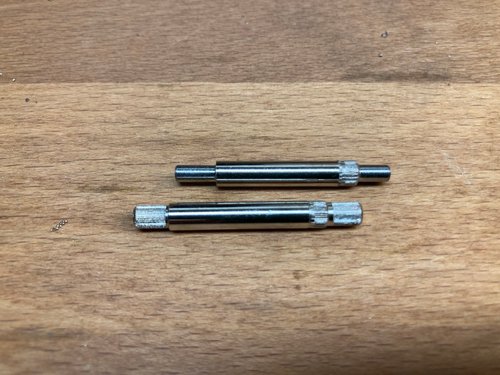
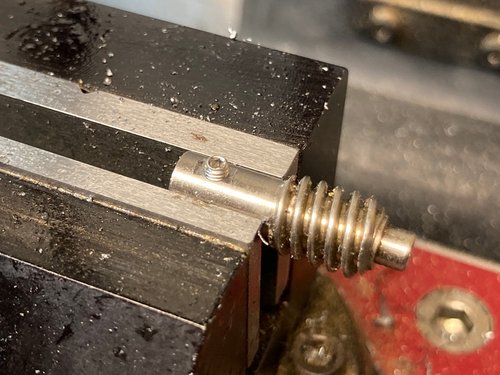
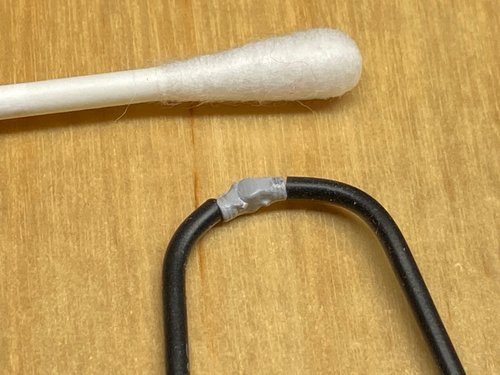
The Faulhaber 2342S012C rating at 17w is the right motor. Not cheap but with great potential. This motor needs fine adjustments in the decoder software to run well at low speeds. To accept the worm gear I made a set screw and flattened one side of the motor shaft. To mount the motor to the truck I had to make brass distance disks with a slight off set. The removal of the worm gear from the Atlas motors was tough but I later learned from experienced modellers that the application of heat helps to loosen the grip. Together with my removal tool this works great.
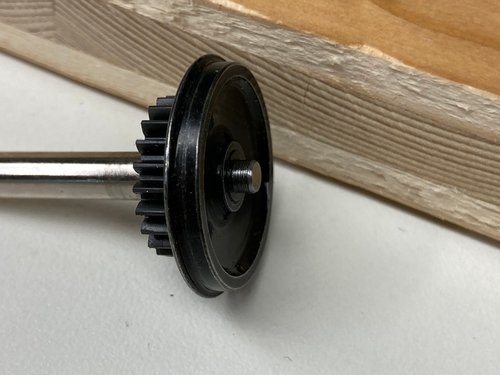
Working the axles
It is essentual to have a good fit and to assemble the wheel sets with great care. Now I have enough experience to show how I do it and what I learned from the masters. I’d say this operation is not difficult at all but of course some thinking ahead is highly recommended to not ruin any parts that would have to be replaced at the cost of a lot of work. I’ll keep you updated.
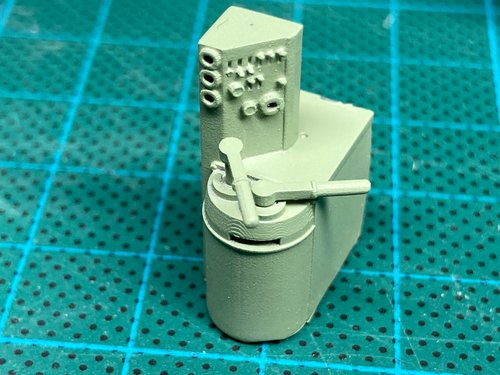
Detailing the Cab
The biggest issue with the Atlas locomotives is the motor mounted directly onto the truck in an upright position. Since it reaches directly into the cab, no detailing is possible unless removal of one motor. I chose to rather have a motor less in my ABA lashup and a fully detailed cab instead. Getting all parts to exactly fit the plastic shell was a lot of work and many prototype prints needed to be made until I ended up with the perfect setting. Now all parts are printed and the cab is ready to come together.
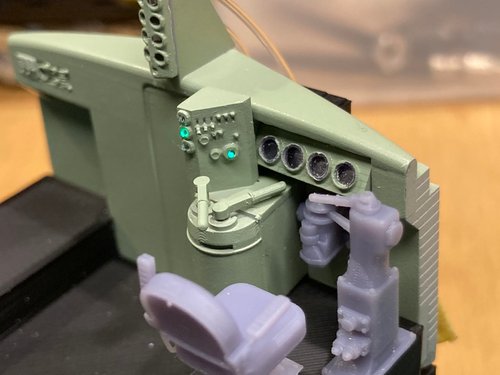
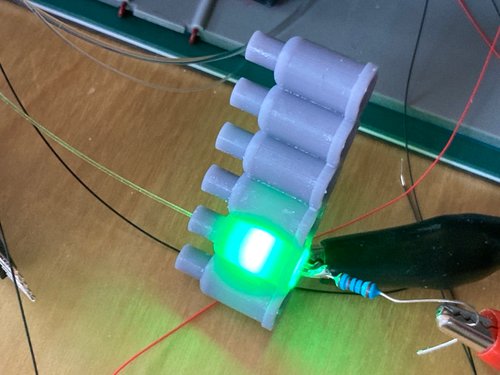
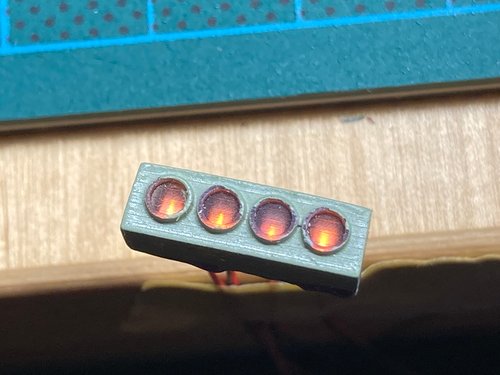
Printed cups connect the LED with the light fiber. There’s space under the cab floor to attach all the light lines and wires. One or two plugs will then make the connection to the decoder. The cab has by now 10 different light fibers and 5 SMD-LED’s for lighting the gages.
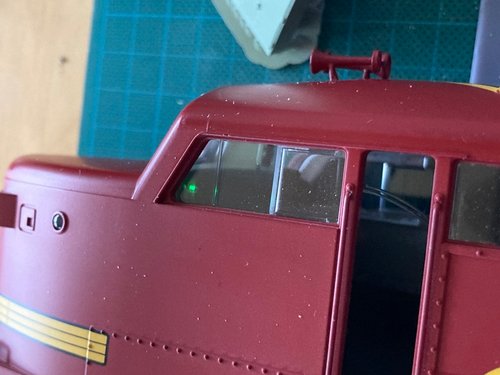
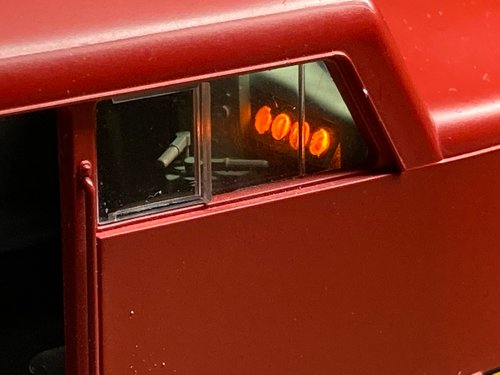
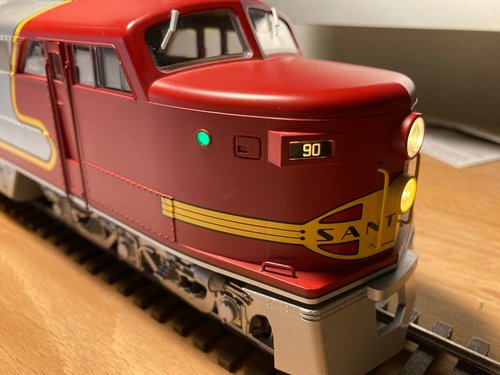
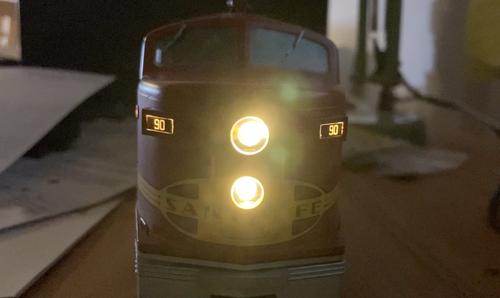
Headlight, Mars light and number board lights were taken from the Atlas model. Actually the mars light circuit with the two individual LED is quite nice! I have changed the classification lights from red to green or white. The red aspect will not happen to be of any use on my layout since the units won’t drive around without train. The green aspects represent a first section while the white light indicates an unscheduled extra train – the classification light will mostly just stay turned off when pulling the 1937 Super Chief, hopefully not too far behind scheudle.
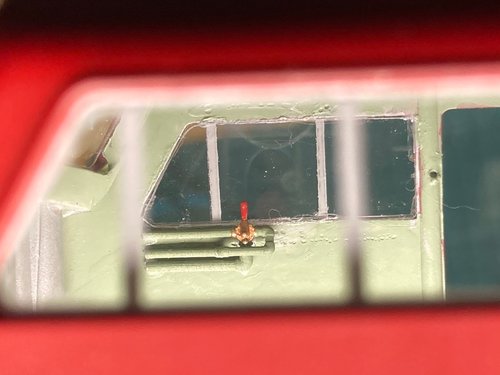
New side window glazing is now in place, not an easy operation. This was necessary to create an acceptable look also from the inside. The right picture shows the sander valve in place on the engineer side of the cab.
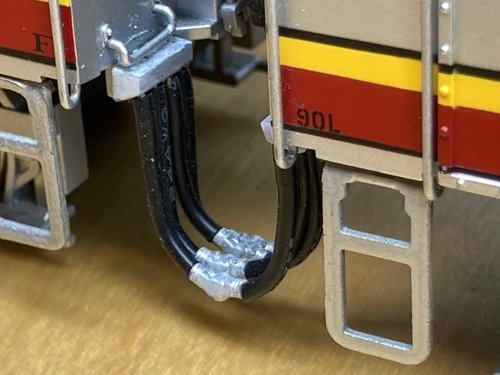
What’s going on between the locomotives? A lot, I hope. Currently I’m working on a drawbar between the units that feature a type F tight lock coupler dummy. I opted against knuckle couplers since the units stay togheter permanently and the slack between them does not look right on the model. Air hoses are being designed with printed heads and are still a bit oversized, will be shrunk to scale shortly.
What's next
Working Diaphragms that enable realistic close coupling of the units is on the agenda. The air hoses will be held in place by magnets to enable easy disconnection for maintainance and cleaning.
6 thoughts on “Proto:48 Conversion of an Atlas Erie Built”
Matthew Coleman
A very thorough and clear description of the conversion. I appreciate the explanation of why you are replacing the motors and it gives me some guidance on replacing some motors in my conversions.
Thank you! I will keep you updated on the motors. I have a Faulhaber 2342 model here but that needs some adaptation in mounting on the trucks. We’ll see 🙂
This is a fascinating project with a lot of pieces you are addressing. I’m really interested in the details and how it goes along. 6 axle projects really scare me, so I’m interested in learning more about how the center axle operates. I’m also interested how the new motor and drive mechanism is configured. Looking forward to updates.
If I recall correctly at least some of the China drives use a two tooth worm gear per revolution. At one time I was considering trying to change to one tooth per revolution gearing but I was unable to press the worm off the motor shafts.
This project was for two MTH GE widecab locomotives purchased quite some time ago.
I have since had some feedback they may perform reasonably well with the two motors in series controlled by a DCC decoder.
All part of my dead line at the loco shop waiting for decoders.
Thanks for your thoughts, I could have tried that, too. However I will install Soundtraxx HO size Tsunami 2200’s and they would not like the starting amps. Let’s find out 🙂


A very thorough and clear description of the conversion. I appreciate the explanation of why you are replacing the motors and it gives me some guidance on replacing some motors in my conversions.
Thank you! I will keep you updated on the motors. I have a Faulhaber 2342 model here but that needs some adaptation in mounting on the trucks. We’ll see 🙂
This is a fascinating project with a lot of pieces you are addressing. I’m really interested in the details and how it goes along. 6 axle projects really scare me, so I’m interested in learning more about how the center axle operates. I’m also interested how the new motor and drive mechanism is configured. Looking forward to updates.
Thanks Greg, I will post updates. This is a test for me – if the 3 axle trucks can be successully converted, all the others might be doable as well.
If I recall correctly at least some of the China drives use a two tooth worm gear per revolution. At one time I was considering trying to change to one tooth per revolution gearing but I was unable to press the worm off the motor shafts.
This project was for two MTH GE widecab locomotives purchased quite some time ago.
I have since had some feedback they may perform reasonably well with the two motors in series controlled by a DCC decoder.
All part of my dead line at the loco shop waiting for decoders.
Eric Peterson
Thanks for your thoughts, I could have tried that, too. However I will install Soundtraxx HO size Tsunami 2200’s and they would not like the starting amps. Let’s find out 🙂