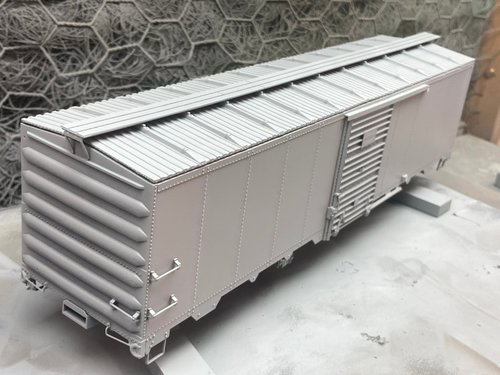
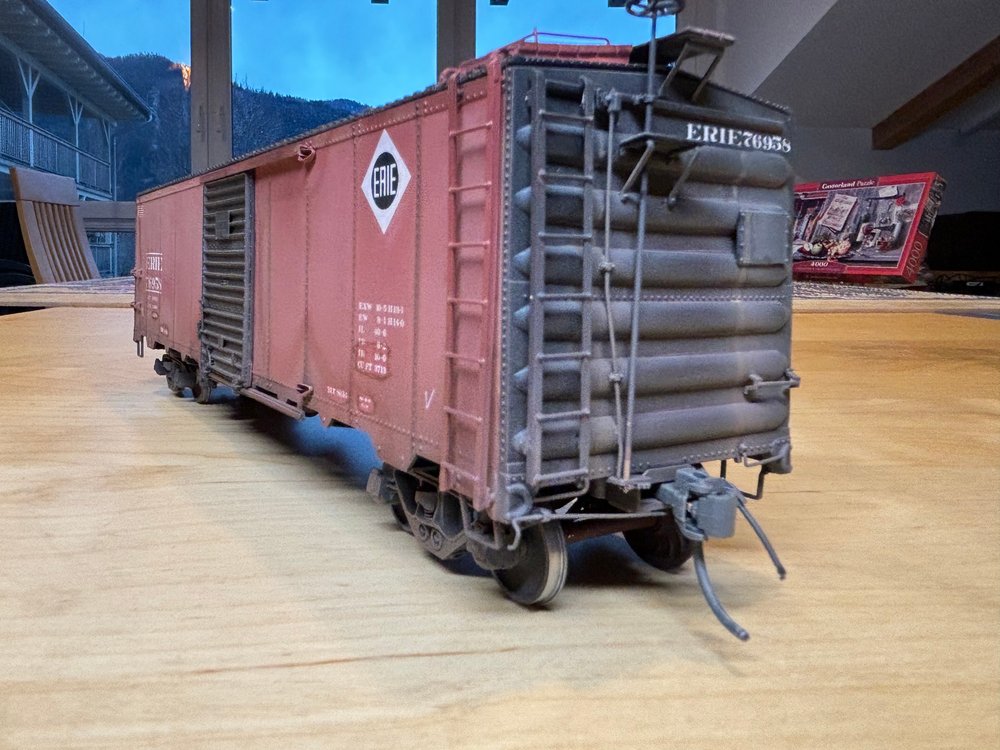
The 1932 AAR standard boxcar is an interesting car to model. The first standard steel boxcar was a major step from the old wooden freight cars. With an inside height of only 9′ 4″ at eaves its appearence is significantly shorter than later standard models.
My good friend George Podas came up with a nice idea to convert an O scale InterMountain steel reefer kit into a 1932 AAR boxcar by simply adding doors and roof of the InterMountain 1937 AAR boxcar kit.
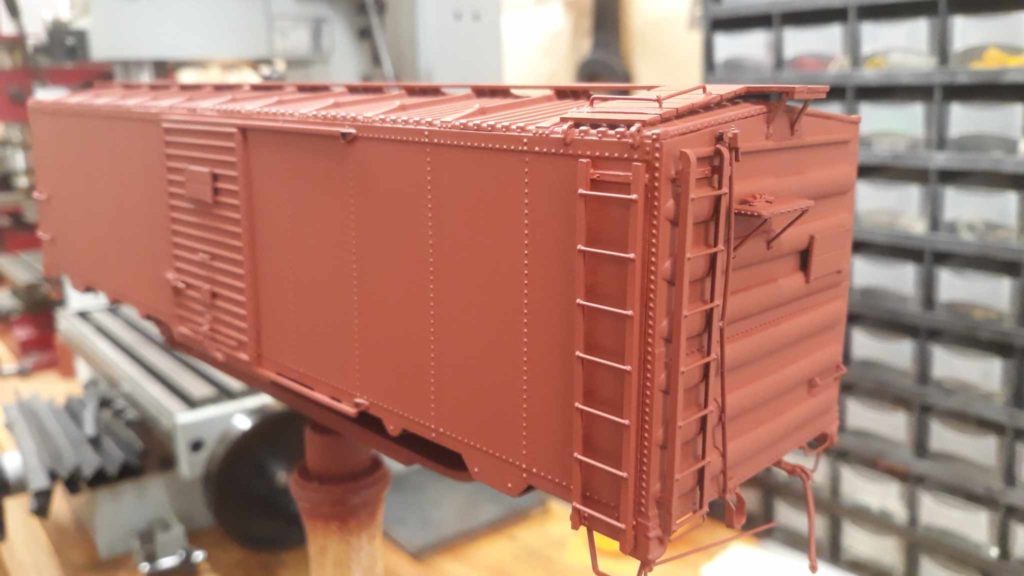
The method works very well and I have added Buckeye ends and a Viking roof to the car to represent that unique and interesting Erie car.
That kit has very close to prototypical dimensions and provides the correct skeleton for the build.
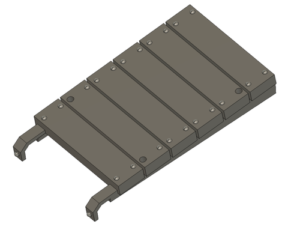
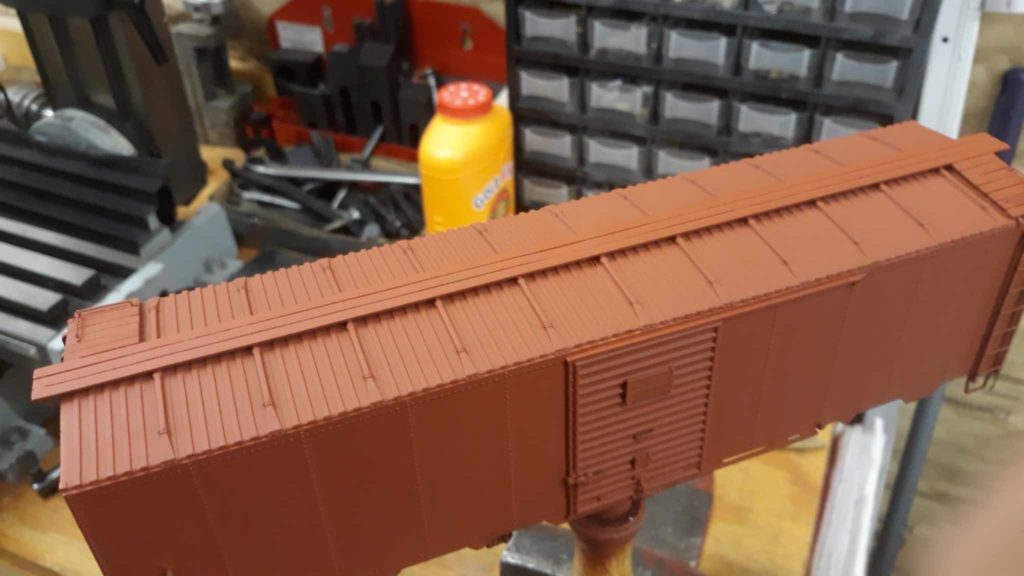
Viking Roof with its characteristic embossing
Erie RR Specifications
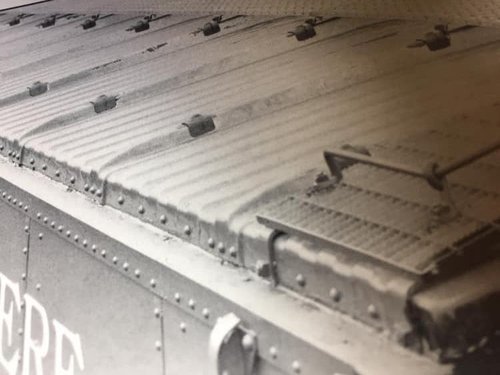
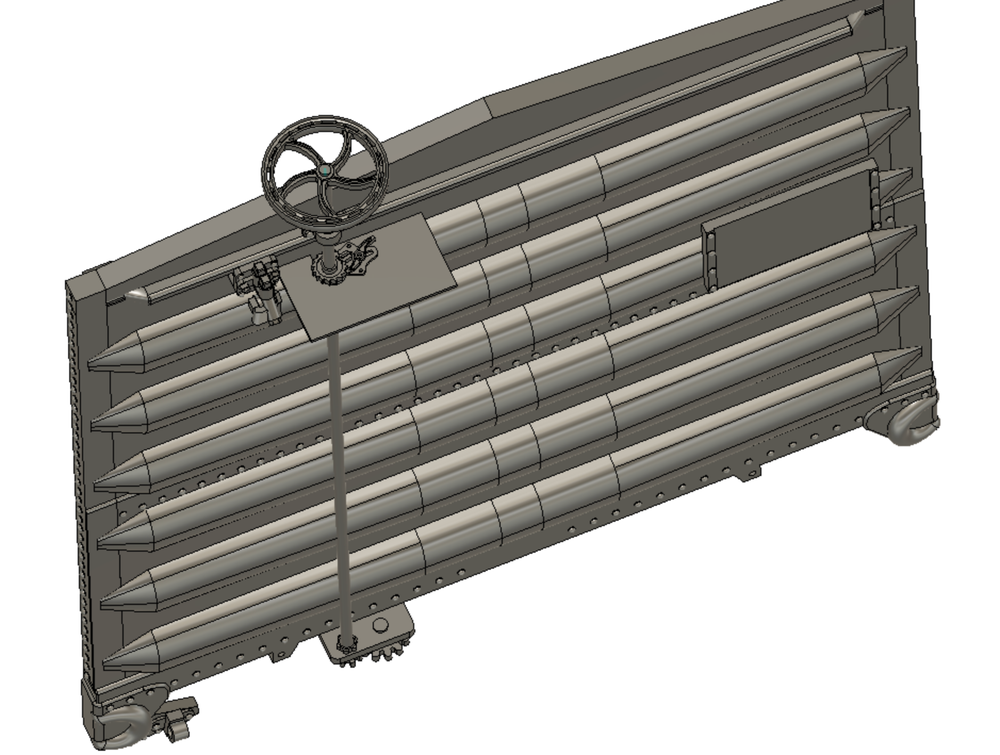
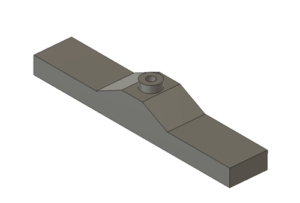
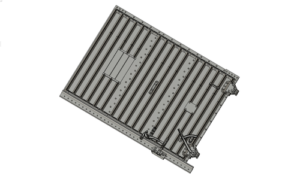
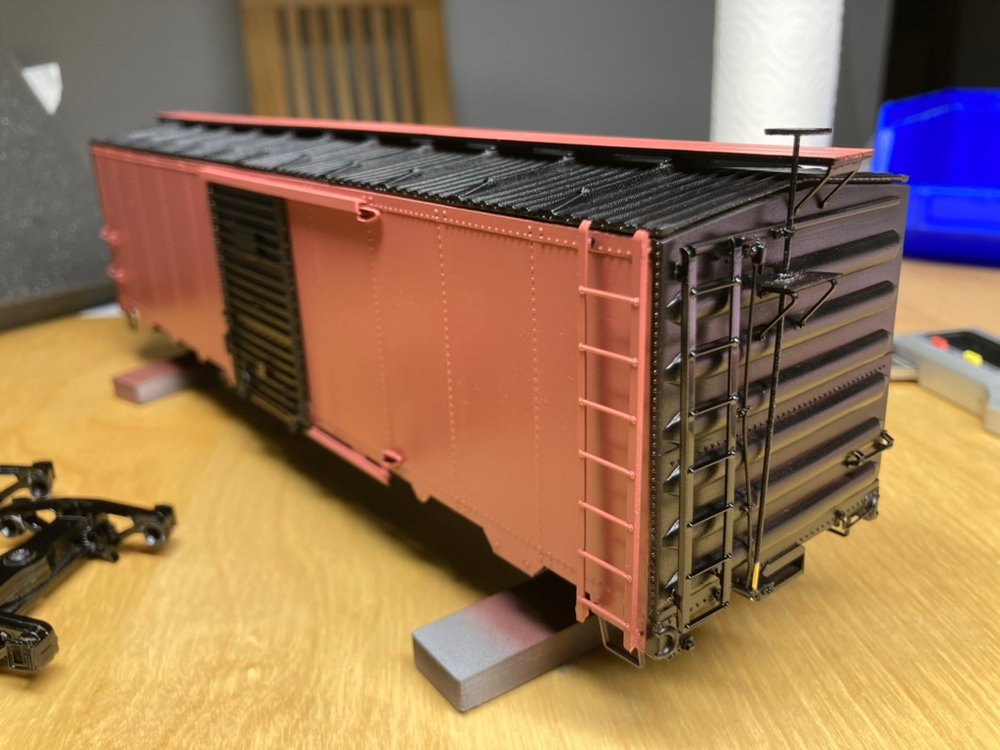
The Erie had a preference for so called Buckeye ends, a special kind of corrugated steel car ends in a 3-3 configuration. Also, the Erie loved the Viking type of boxcar roof, that was popular only with a handful of railroads.
Buckeye Ends on an Erie milk car
End Removal
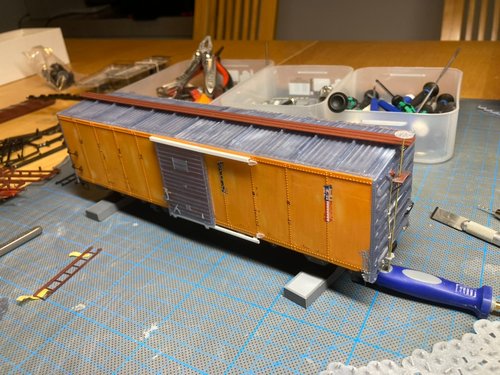
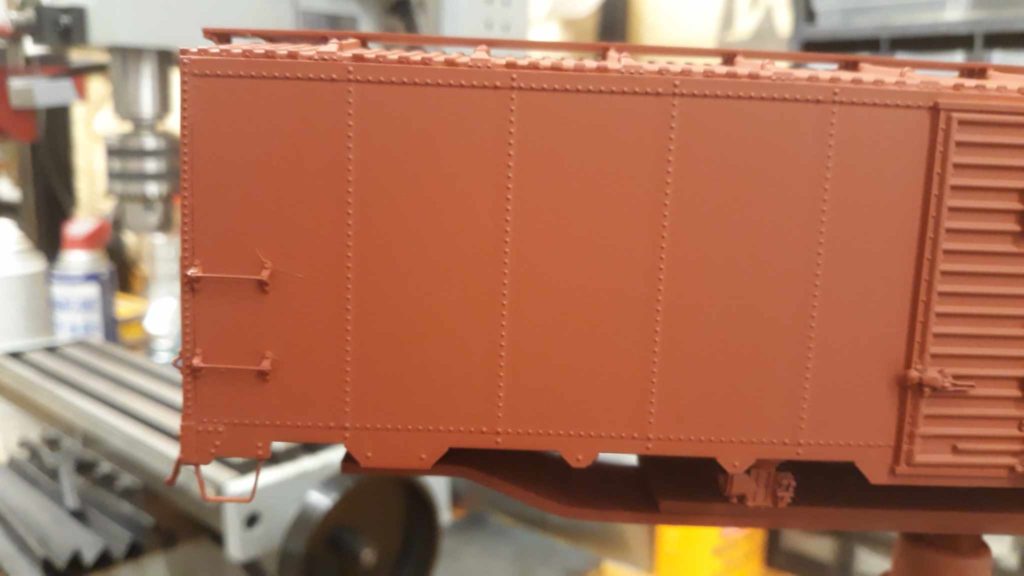
The scariest part is to cut off the car ends. I c-clamp the car between two wooden blocks that serve as a guide for the razor saw. The injection plastic is very easy to work with but a fine bladed saw should be used for a clean cut.
The riveted corners have to be cut off and will be replaced by the resin car ends.
Shaving off Rivets
Quite a lot of rivets have to come off, they are not correct for the 1932 AAR boxcar and are easily removed with a sharp chisel. Be very careful not to accidentally shave off those needed. The builders photo of one of the class prototypes clearly shows which rivets should be left in place.
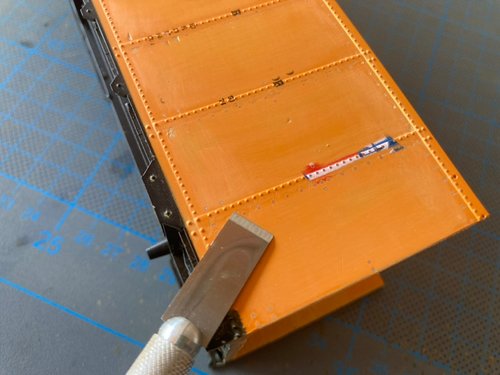
To eliminate any see-through effect of the lettering and to provide good paint adhesion, I use a fine sanding sponge to sand away most of the lettering.
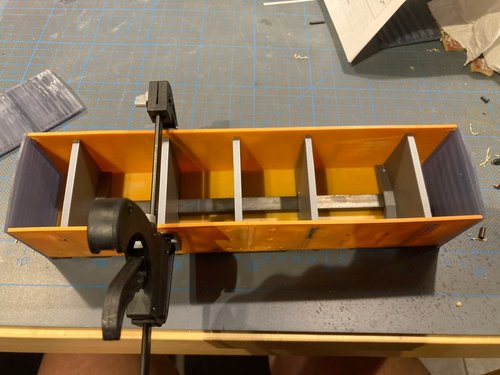
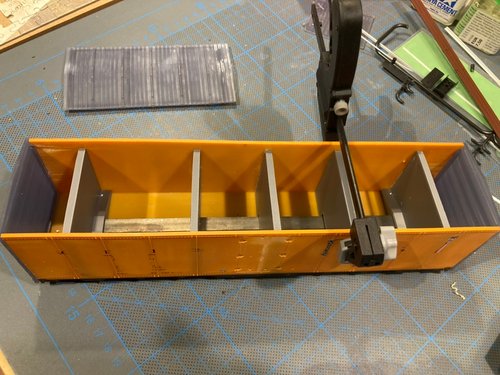
Adding Weight and Stability
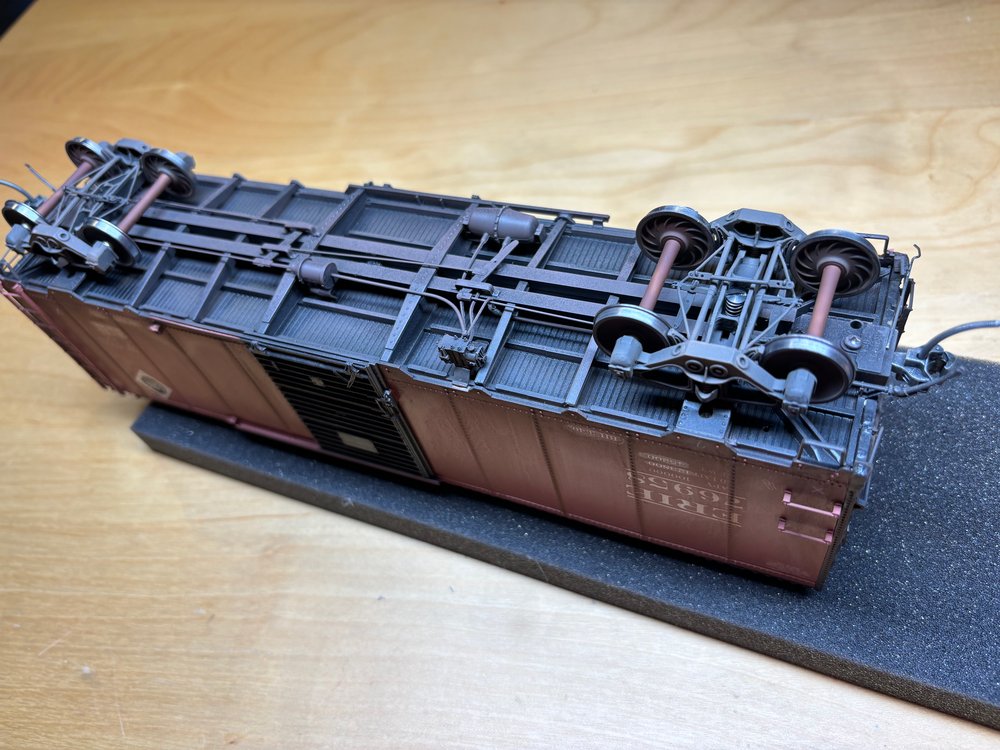
I found it extremely helpful to add some rigidity to the plastic car body. Therefor, some stiffeners have been designed to exactly fit inside, providing stability and preventing a fish belly to form. These parts also serve as a weight holder that will fix the weight to the bottom of the car. It is essential to give these cars the right weight in order to keep them on the tracks and to ensure good tracking. I use two strips of 10mm x 4mm metal that I stack on each other. The weight sits centered and very low in the car, that’s exactly where it should be for good performance. Use the drill templates to define hole position, the screws will disappear in the car bolster. I use PLA for these parts, the prints can be tapped directly and provide a tight hold for the screws.
Glueing Ends and Roof
The ends should fit without a gap. I recommend to use a sanding tool to ensure a tight fit, that’s also less work compared to the usage of putty. Test fit everything before glueing. A slowly drying CA comes here in handy since a fast glue can quickly ruin a model when big parts cure in an offset position.
B-End Details
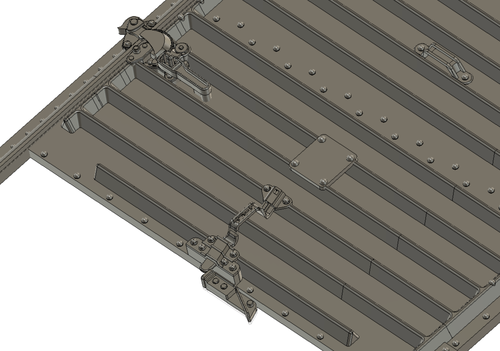
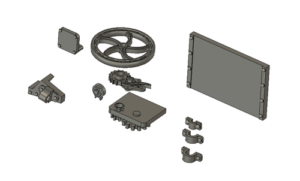
I use the brake platform angle parts from the Intermountain kit but use a strip of styrene as a new platform. Instead of simply bluntly glueing these tiny parts to the car end, I pre-drill in the exact position to ensure a strong fit. CA works very well here. A brass brake rod is inserted with a diameter of 0.8mm. I’ve recycled the kit’s Retaining Valve in my build but designed a very accurate double pressure retaining valve by Westinghouse that can be glued to a 0.5mm brass wire.
The uncoupling lever is made of 0.8mm brass and held in place by the little guide glued to the left push pocket. Be sure to use a 0.8mm drill bit to clean out the eye. Once the Kadee coupler is installed, the brass uncoupling lever is glued in place.
Adding Doors
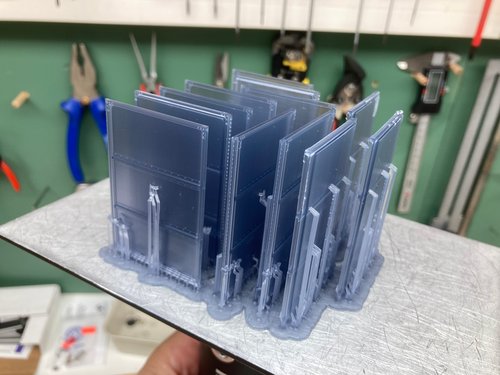
Printing the door in an upright configuration has proven the best method so far. I have tried different approaches and printing the door plus details all in one worked by far the best. Careful placement of supports is crucial. Be sure to reinforce the very bottom of the door with many medium and maybe two large supports in the corner. Also add some supports to the backside to give the whole structure more stability and rigidity.
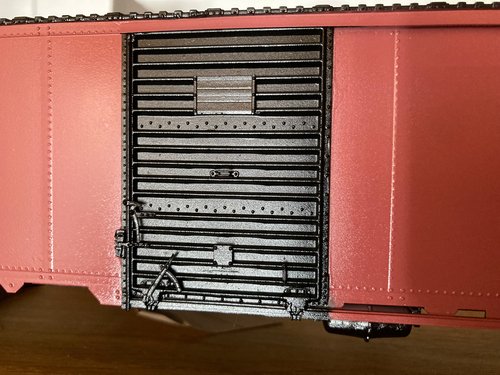
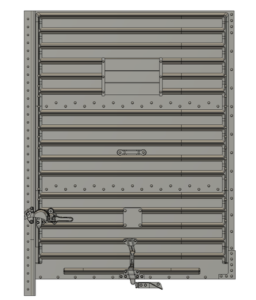
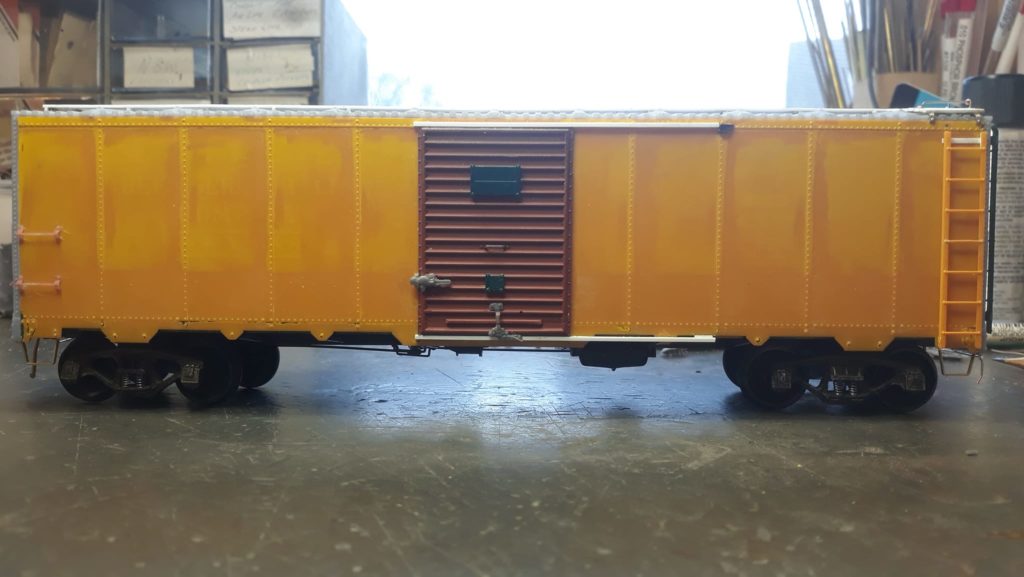
The doors were held flat so that they can be glued directly onto the reefer sides. Be sure to remove any rivets from the car sides and glue the doors in place with some care to make sure that all corners have strong contact to the sides. I model the door railing with styrene strips and an L channel. The prototype photo of ARA #3 above is a good guide. I was not able to find close-ups of an actual Erie car but found a low-res color shot that I show down below. It clearly shows the Youngstown door in combination with Creco door hardware. Please note that I have both models ready for download and deside for yourself which one you want to model.
The files include two drilling templates, one fits the car bolster section before the underframe has been added. The bigger one spans over an underframe that has already been glued in place. These templates match the screw holes of the weight holder above. Two types of struds to choose from. And of course the weight holder section that should be mounted exactly above the car bolster.
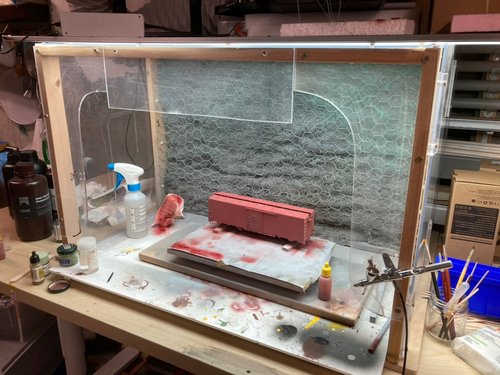
I use these “shop trucks” to handle my kit in progress. They come in handy when parts of the underframe are built and handling might cause damage. Also very useful for airbrush painting.
This is the actual Buckeye car end with its characteristic corrugation. Best printing results from my experience in upright position on the build plate.
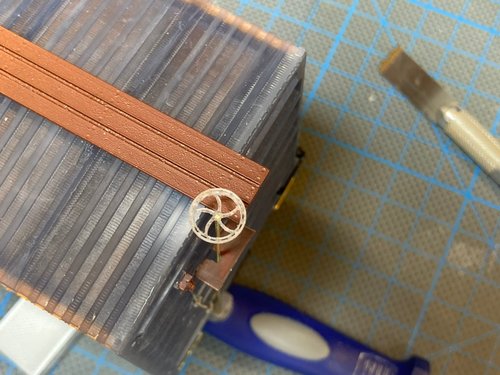
Detail parts include a brake wheel, clasp, rachet, tack board, retainer valve platform and a piece with a guide for the uncoupling lever that can be glued to the left push pocket of the car. CA works very well here.
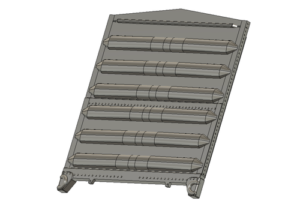
The Viking roof – you’ll find a fully assembled roof for large printers, as well as two halves that fit together for smaller build volumes. On my build shown in the pictures I’ve used the halves.
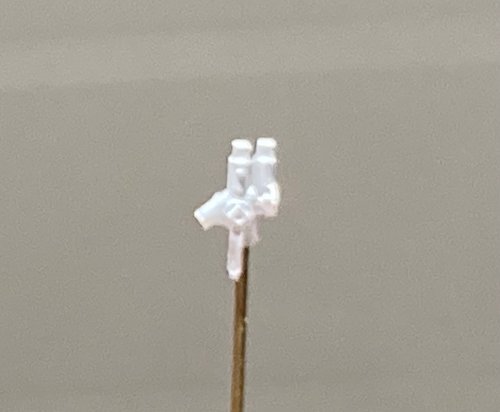
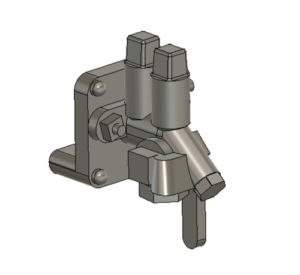
The Westinghouse Double-Pressure Retaining Valve is an important part of the car’s air brake equipment. It allows switch crews to manually control the brake cylinder air pressure and is mounted high on the B-end of the car to be reached from the brake step.
Latheral running boards – I would recommend to use the Intermountain running board from the reefer kit but you will need two end platforms. They should be glued directly on top of the raised portions of the Viking roof panel.
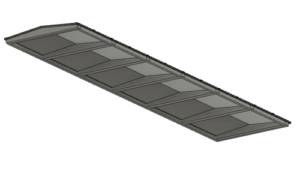
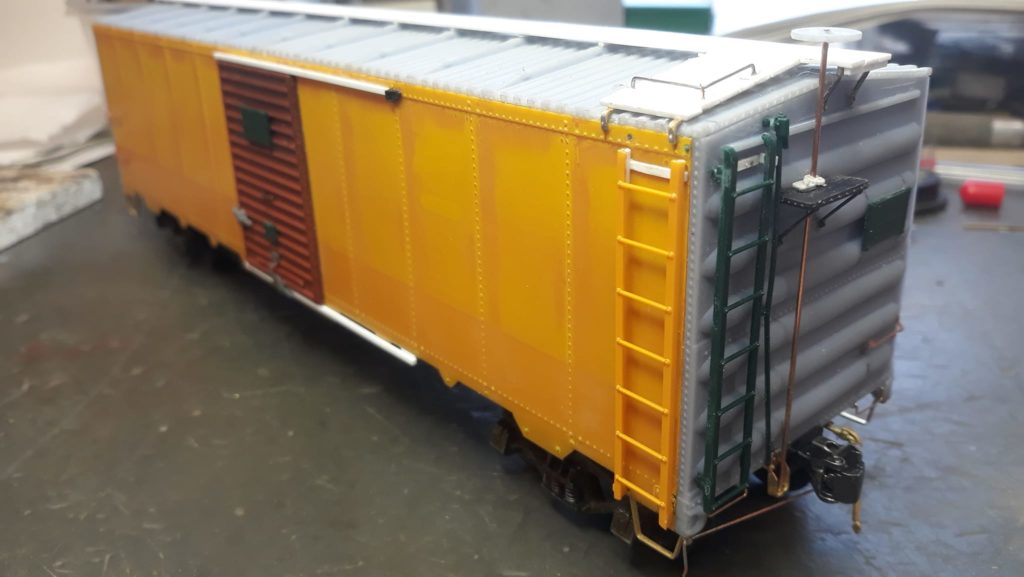
The Erie cars were equipped with CRECO door fixtures. I was not able to locate more than two pictures of the car’s doors and they showed exactly this setup. The Youngstown corrugated door at 6′ width has been designed especially for fit the InterMountain reefer kit. The corrugation pattern is a prototypical 5-4-5.
This Youngstown corrugated door variant is very common among other railroads 1932 boxcars at 6′ width and has been designed especially for fit the InterMountain reefer kit. The 1932 AAR boxcar is quite short compared to more modern designs and stands out nicely in a freigt train. The corrugation pattern is a prototypical 5-4-5. Camel lift fixtures, starter and lock resemble the door hardware.
I have had great results with Tamiya grey primer from the spray can. It is my choice when it comes to prime resin printed models. Car ends, roof, underframe and doors were all coated with black car cement when delivered. I mix up Tamiya color for a relatively bright tone of boxcar red. I paint the car withoug B-end detail or ladders attached, that makes the process much easier. I only apply the ladders when the car has been weathered.
Weathering
On this particular car I’ve applied an extremely thin mixture of just a little Tamiya XF-15 Flat Flesh and a lot of Alcohol. I airbrushed this mix on to kill the shine and create a tooth for the next layers to grap onto. To pronounce the rivet rows where dirt naturally builds up, I cut out a piece of cardboard as an airbrush template. The same could be done with masking tape but I feared for the decals to come off when removing the tape. That dark brown was then misted around the lower section of the car.
This technique with Alcohol and Tamiya paint allows for a very slow and careful building up of the effects. A dark brown enamel wash was applied and some kick-up dirt carefully added to the car ends.
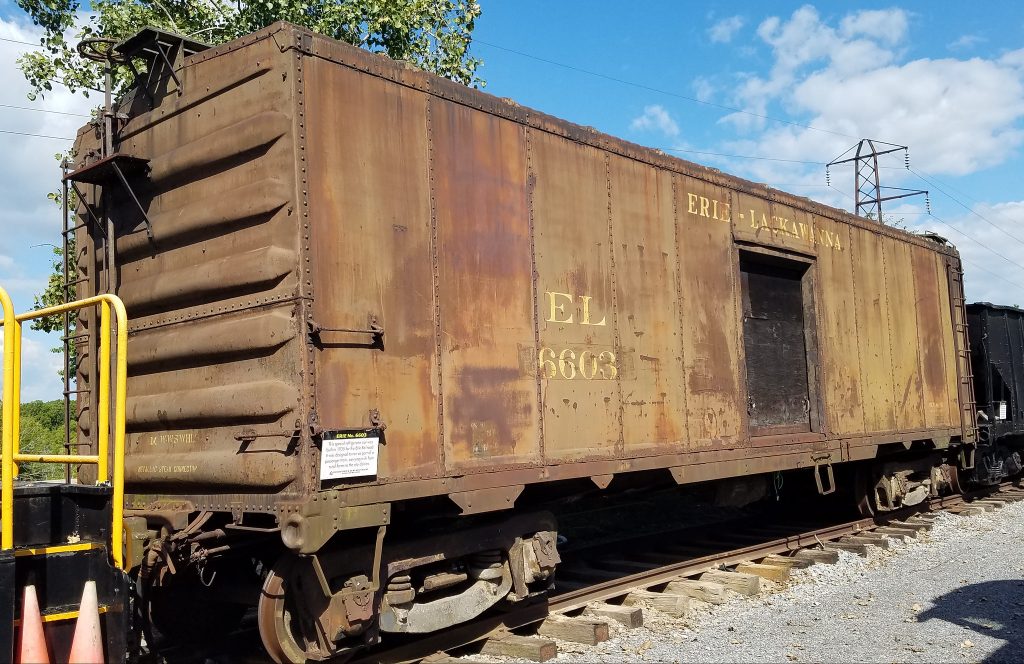
Prototype Pictures
Pictures of this particular freightcar are extremely rare and this is a very welcome photograph of the car as it looked in the late 1940’s. Note the rather unique door configuration, a Youngstown 5-4-5 panel corrugated 6′ door featuring CRECO door fixtures. The Erie had it’s own taste with many things.
Please note that there are two door types ready for download, I leave the desicion to the modeler since I am not an Erie specialist.
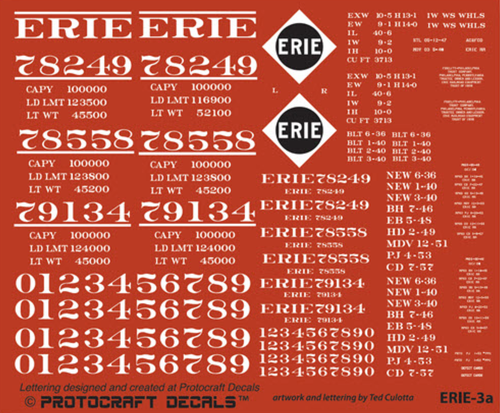
Item Number is ERIE-3a. These decals have originally been designed for the ERIE 1937 AAR boxcar type but cover our car very well. The pre-set numbers do not match and have to be corrected but that’s not really a drama.
Car Numbers
500 cars were built in August 1934 #76500 – 76999.
George Podas
An other car is currently under construction by my good friend George, who is a fine craftsman and builder of exquisite O scale rolling stock and locomotives. He’s using my files for this particular Erie boxcar. It’s a joy to see other modelers making use of the little things on this website. Thanks George!