Detail Parts
For the InterMountain 1937 A.A.R. Boxcar Kit
An Outstanding Kit!
The charakteristic bworn and white box contains one of the backbones of serious modelling the transition era in O-scale. This plastic injection kit is an exact copy of the 1937 A.A.R. boxcar design that was most popular amongst the railroads. However, if you try to build a certain car, you might run into some detailing problems. Specific cars could show a variety of different “decorations”, such as many different door types, roofs, rung ladders and hand brakes. I am gaining a lot of pleasure in researching the prototype cars and then detailing the kits accordingly.
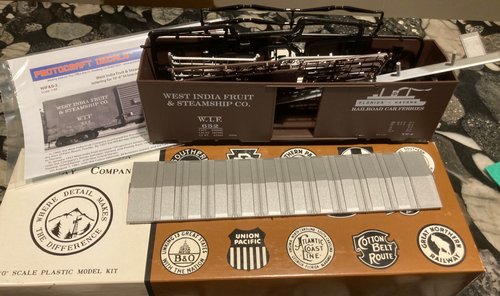
If you are willing to dig a bit deeper into this fascinating aspect of the hobby, I have a wonderful source of knowledge on hand. Ed Hawkins has provided an accurate table of as-built 1937 AAR Box Car Prototypes that list all the different outfits that were in use. I rarely use the factory paint scheme, more often I prime and repaint the car and apply my own decals. Most of the decals are available from PROTOCRAFT. The website provides a ton of lettering information and is a wonderful source of knowledge, the decals are of high quality.
So once you know what you want, let’s talk about the details! The Youngstown doors that come with the kit are a bit clumsy and do hardly show the actual door hardware. It is my mission to provide all types of doors for these cars as 3D files for you to print.
Perfect Fit!
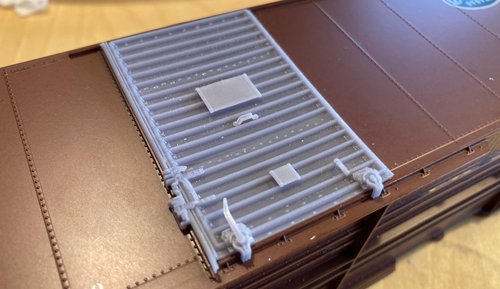
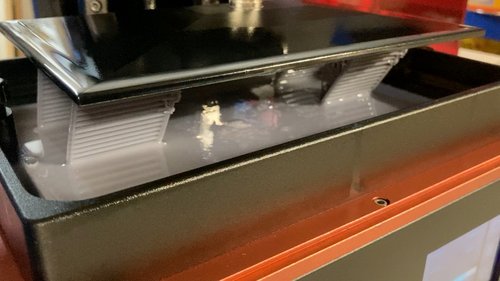
I took a lot of care to ensure a very tight fit within the door frame tat eliminates any trimming work. Since cured resin still has a certain tendency to warp and deform, I’ve created a certain thickness of the door base and this really helps to minimize the effect. Once glued in place this is no longer an issue but make sure your parts are properly cured prior to installation.
The Viking roof, consisting of two parts, is also specifically designed for this car and fits perfectly.
From the Prototype
All designess that I have drawn were made possible by people who helped me along and provided detailed drawings and knowledge of the prototype.
I would especially like to thank Gene Deimling, who is an excellent modeller and frequently publishes about Proto:48 on his blog.
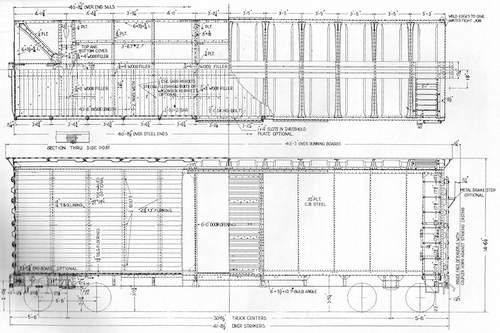
A great source are of course the different Car Builders Cyclopedias. Using the plans and measurements ensures a certain quality in the final results. Even small parts turn out so much better with today’s printing technology when carefully drawn.
Here’s a quick video about the design, how I slice the file in Lychee Slicer and a guide on putting the parts together. Please remember, English is not my mother language but I am constantly improving my vocabulary 😀
Youngstown Boxcar Door with Type 1 Camel lift fixtures
The Youngstown corrugated side door with it’s charakteristic ribs was by far the most common type of door by the 1930’s. The design was extremely successful and was combined with diffenet kinds of door hardware. The Camel Co. type 1 lift fixtures were the industry standard by 1940. Holding down the lever would lift the door and enable it to slide. This clever design ensured a weather tight fit and prevented the heavy door to accidently move when open. Many thousand cars were equipped with that hardware. Please note that “type 1” is not an official term but it helps me to not getting confused with the different types.
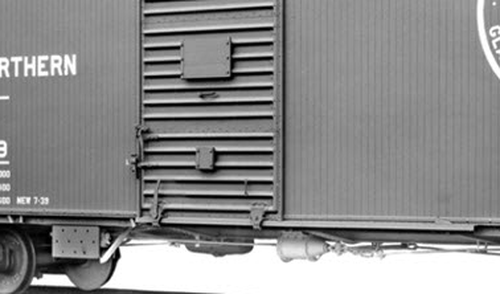
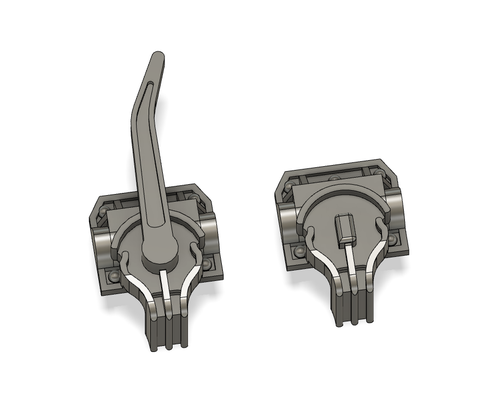
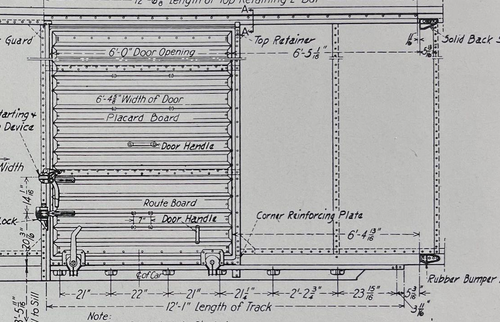
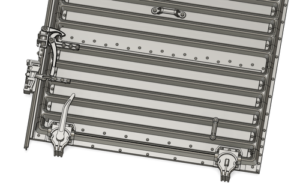
This Youngstown door will perfectly fit into an INTERMOUNTAIN 1937 A.A.R. boxcar kit. Separate parts are included – handles and lift fixtures and tack boards. Note that the holes for the main handle are pre-drilled only on backside so the mounting hight can be chosen.
Youngstown Boxcar Door with Type 2 Camel lift fixtures
Same Door, different hardware. The Camel Co. type 2 lift fixtures come with the IM kit but were poorly modeled. They were released after type 1 in the evolution of door equipment but apperantly both types were used almost equally. Please note that “type 2” is not an official term but it helps me to not getting confused with the different types.
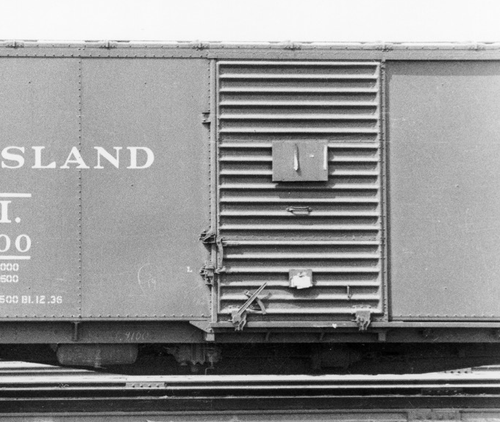
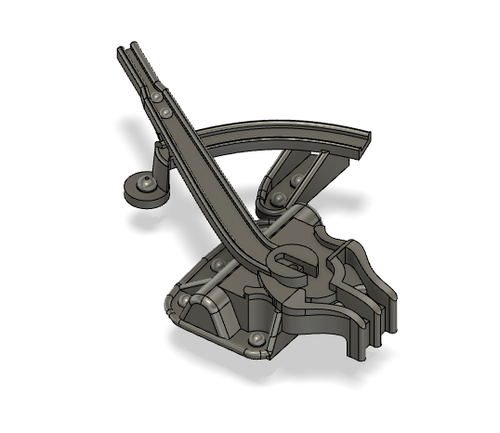
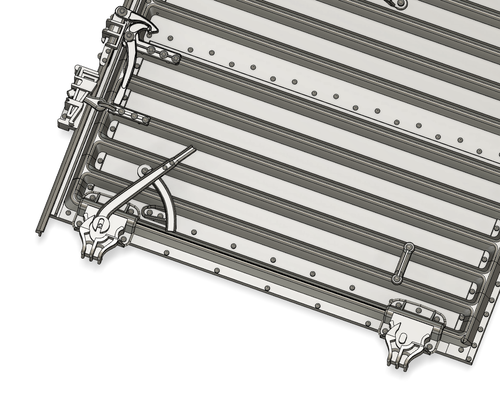
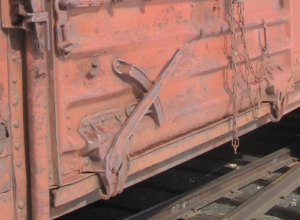
This Youngstown door will perfectly fit into an INTERMOUNTAIN 1937 A.A.R. boxcar kit. Separate parts are included – handles and lift fixtures and tack boards. Note that the holes for the main handle are pre-drilled only on backside so the mounting hight can be chosen.
Superior Welded Steel Door with Creco Fixtures
Many series of the 1937 car design were equipped with Superior doors by the Superior Car Door Company of Chicago, Illinois. The design promised less weight and a very tight fit to keep the elements out of the car. A completely new approach to closing and locking the door is the “Superior automatic lift handle” Detailed information can be found in the 1946 Car Builders Cyclopedia, page 457. These doors were even more popular amongst post war freight cars as the steadily increasing numbers in use proof a superior design.
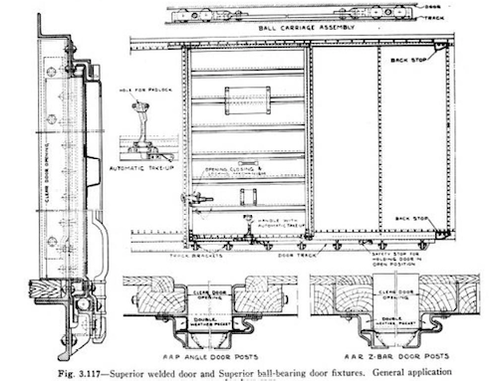
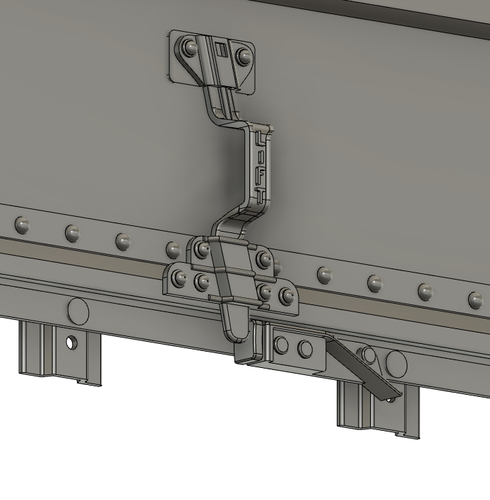
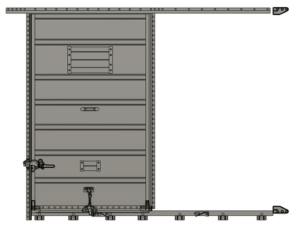
This Youngstown door will perfectly fit into an INTERMOUNTAIN 1937 A.A.R. boxcar kit. Separate parts are included – handles and lift fixtures and tack boards. Note that the holes for the main handle are pre-drilled only on backside so the mounting hight can be chosen.
Youngstown Boxcar Door with #50 Camel Co. door rollers
These are the Camel Co. #50 door rollers that could be found on most doors manufactured in the early 1930’s. I have not yet found proof that they have been used on the 1937 A.A.R. cars but the hardware was widely used in the early 1930’s and can be called the predecessor of the types above. The part might be of use for you when modelling a wooden sheathed boxcar.
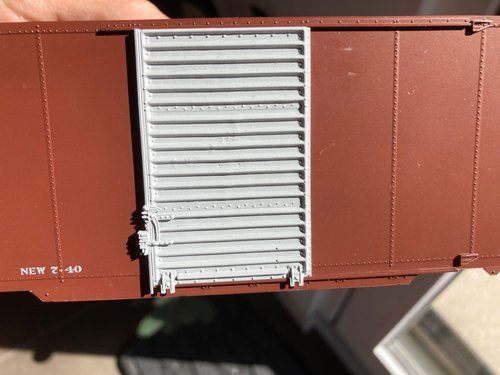
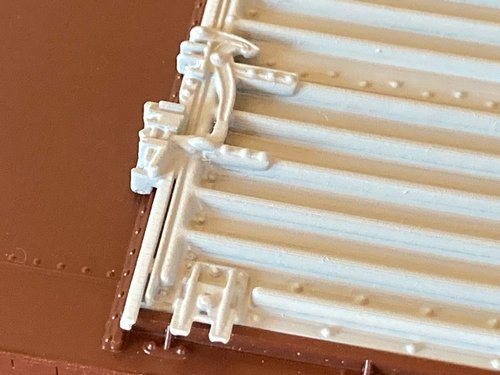
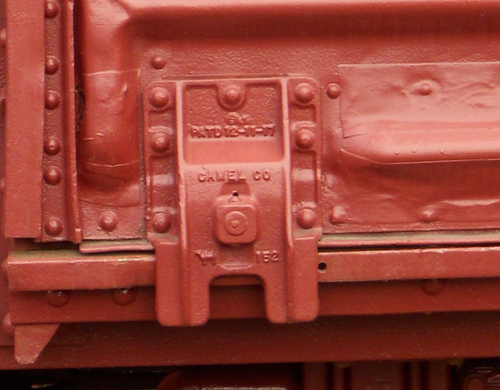
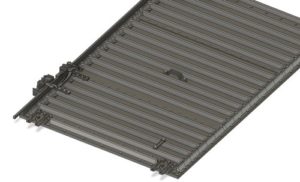
Youngstown door with Camel #50 door rollers. Separate parts are included – handles and door rollers.
Improved 6' Youngstown Door (6' 6/6/5 IYD)
Right after the war there were some improvements made regarding the durability and performance of lift fixtures. The new design was so good that it became the base of future Youngstown door specifications. The door used lesser parts and the lift mechanism was better protected inside the door structure. You can now model an accurate door on your SP B-50-24 boxcars.
Southern Pacific B-50-24
SP 97620-98069 (450 cars) built in 1946 received this door. Many were painted in the famous all-black Overnight L.C.L. scheme. These cars can be modelled with an InterMountain 1937 AAR car kit and my door files.
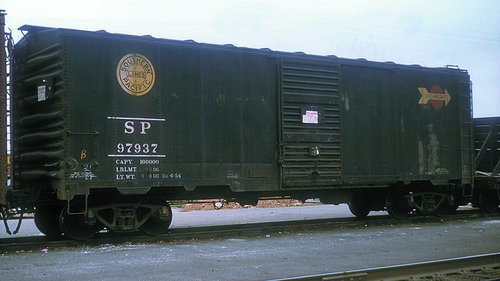
Union Pacific B-50-39
The first 2000 UP cars that made use of this advanced door design. My door is just a bit shorter than required but could easily be adapted to be used in these slightly taller cars.
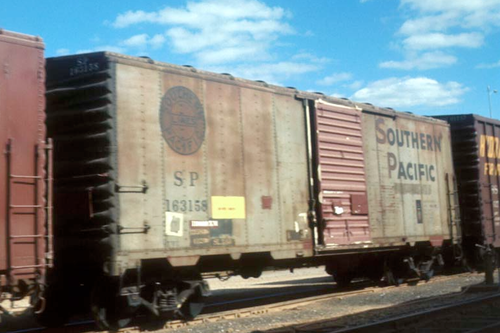
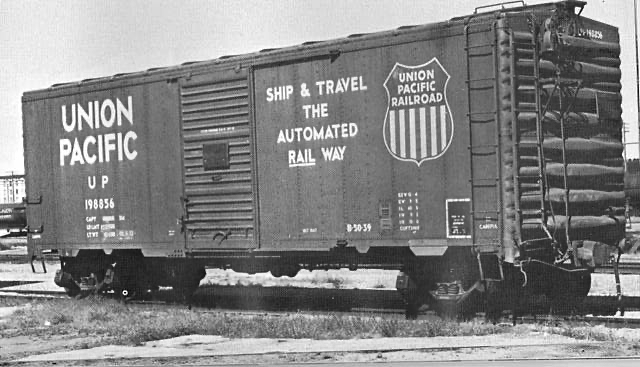
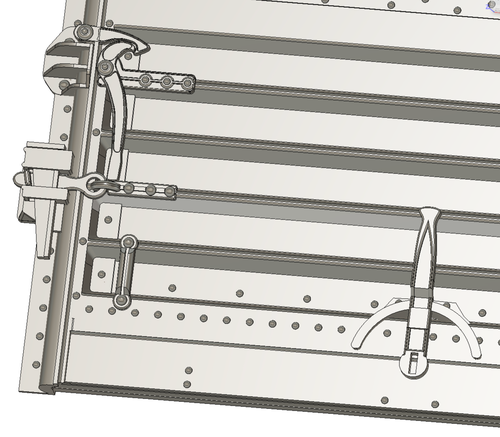
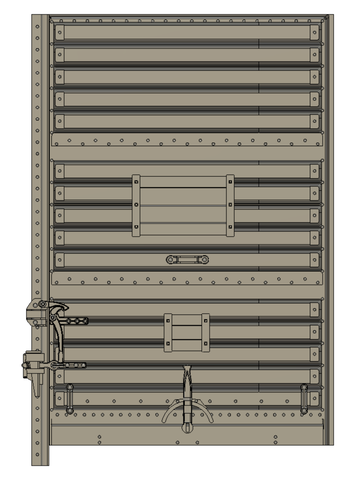
Improved Youngstown Door with Camel hardware – a very popular door design starting to show up around 1946 and becoming very popular in the 1950’s.
Buckeye Ends (ERIE RR)
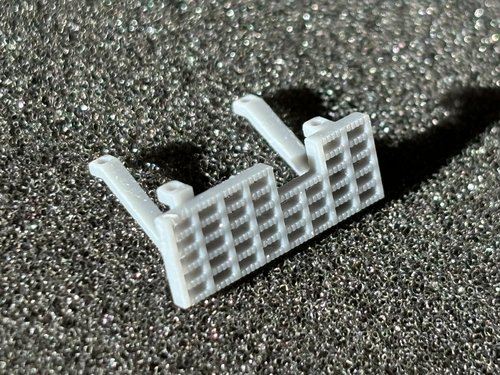
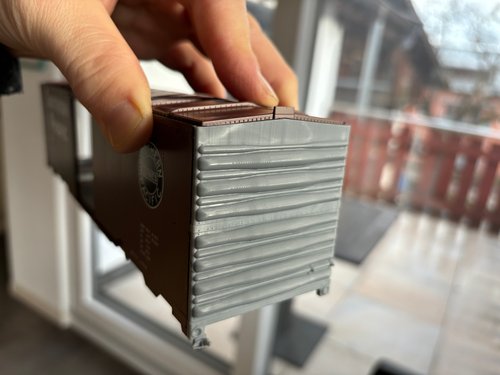
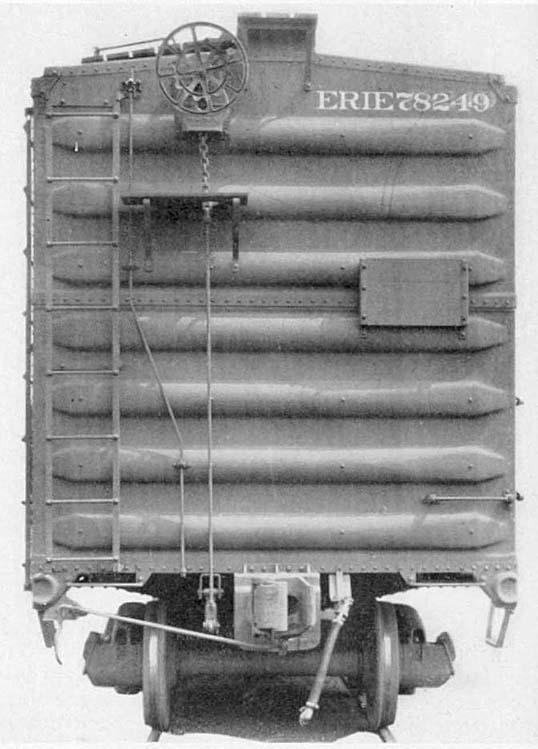
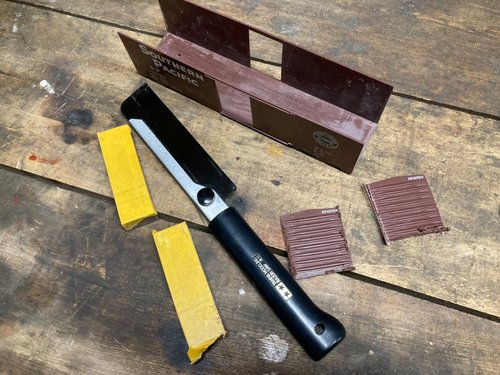
The Erie had 500 cars of the 1937 AAR type on it’s roster with the unusual configuration of Buckeye car ends, being basically massive corrugations. You can model such a car by cutting off the car ends of your Intermountain kit. The 3D files for your new Buckeye ends fit perfectly. Just make sure you cut the ends off very precisely, I’ll show you how.
Car Numbers – 78000 – 78499 (500 cars). Decals are available from Protocraft. The last 250 cars of that batch had National B trucks. The project also requires a Wiking roof, available below on this website.
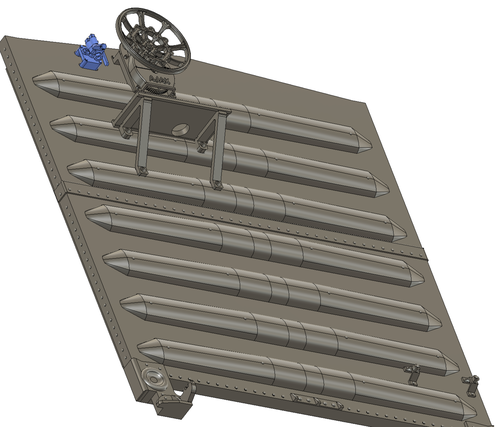
The grab iron brackets of the car ends have been designed to be completet by gluing a piece of brass wire in between. Make sure you do an exact cut and use CA.

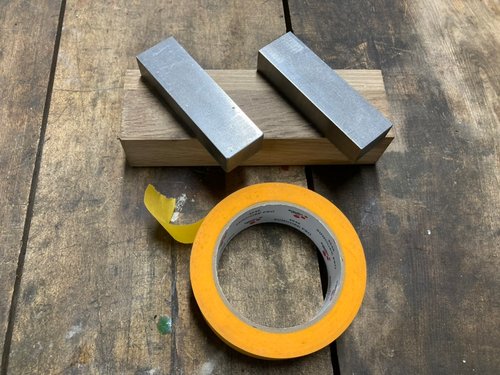
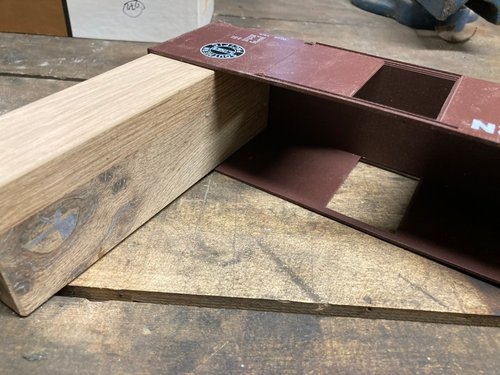
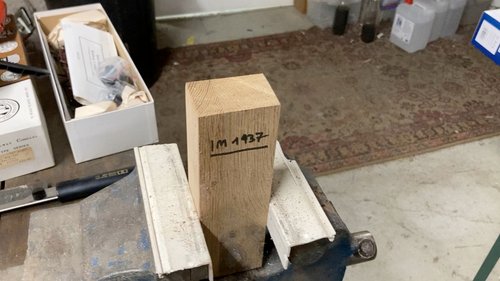
Step 1)
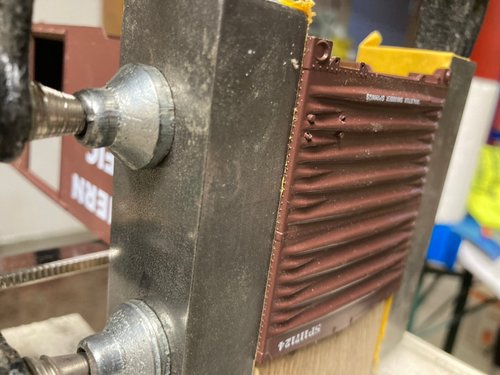
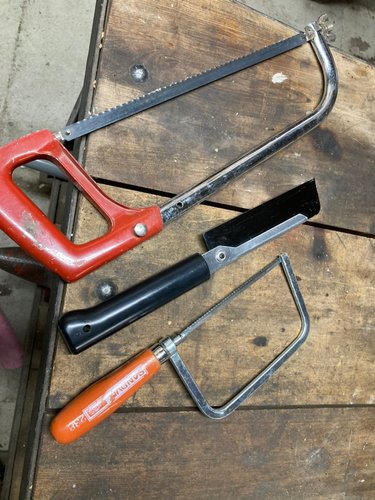
Cut a wood block to exactly fit inside the car shell. It will gain support and prevent the plastic from getting crushed. Prepare two pieces of steel or hard wood as a guide for the razor saw.
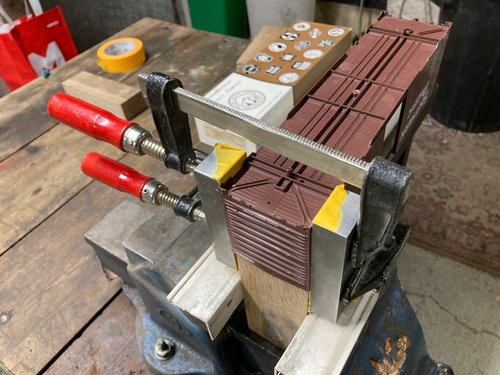
Step 2)
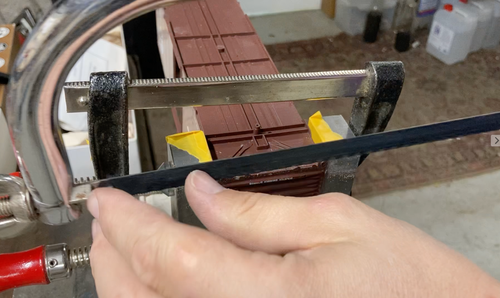
Clamp the wooden block in your vise. Press the two guide pieces against the car sides as shown. Wrap the contact surface in some tape to protect the rivet detal.
Step 3)
Make sure you only cut off the raised car end with it’s rivets and not parts of the car sides! Take your time and do not melt the plastic.
Step 2)
Clamp the wooden block in your vise. Press the metal guide pieces against the car sides as shown. Wrap the contact surface in some tape to protect the rivet detal.
Step 3)
Make sure you only cut off the raised car end with it’s rivets and not parts of the car sides! Take your time and do not melt the plastic.
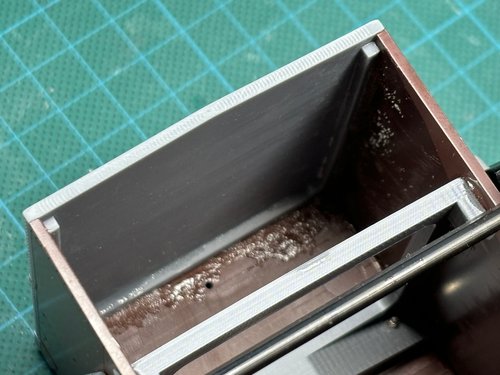
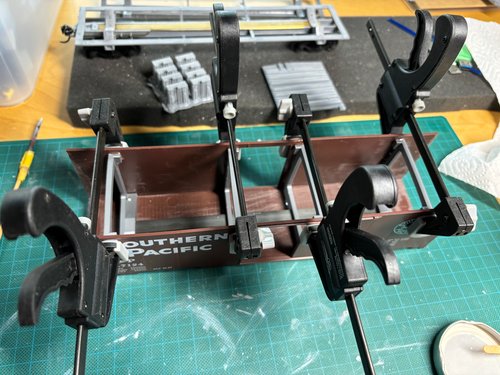
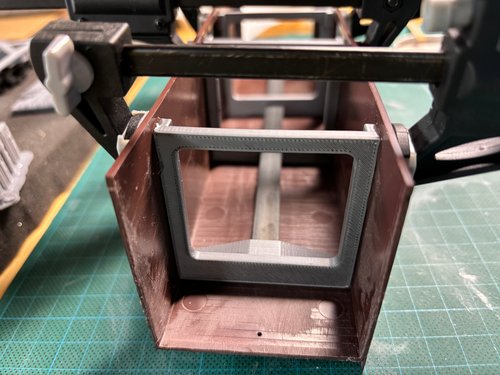
Step 4)
Assembly. Make sure to achieve a very good fit, use sand paper to remove any burr. I use 2k epoxy to glue 3D resin to plastic. The quality of this step is essential, you don’t want any parts to come loose. You can also use my stiffening jigs and weight holder, it makes the assembly of the roof much easier and you can weight your car as you need. Without these, roof assembly is extremely difficult and the thin plastic car sides tend do form a belly.

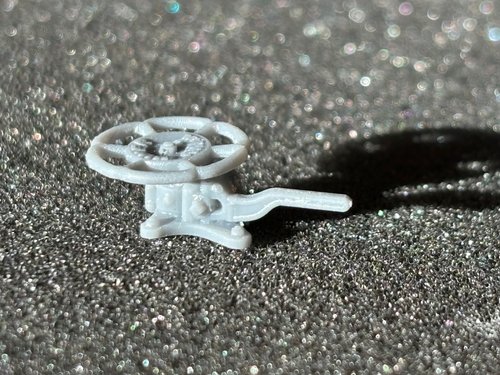
Buckeye Ends (A & B) for your IM kit – complete with step board, retainer valve and AJAX-handbrake equipment.
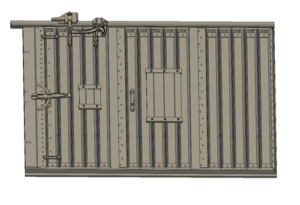
3 Panel Creco Door with Creco Fixtures
This door produced by Chicago Railway Equipment Company (Creco) was very popular in the early 1930’s. Some Railroads had even their 1937 A.A.R. cars outfitted with these doors. This detail part has been especially optimized to fit the Intermountain 1937 AAR Plastic kit.
The zip file contains three doors – one is very thin, the other is reinforced and the 3rd one allows you to create an open door. Also the placard boards, the door locker, the stoppers and the safety stopper are included and can be applied as needed.
Confirmed 1937 AAR cars that had the 3 Panel Creco Door
C&O 5250-5399 (5/4 Dreadnaught ends)
C&O 5400-5499 (Deco 3nd boxcars)
READING 103000-103299 class XMv
READING class XAe
A double door variant will follow.
Deco ends (waffle) will follow.
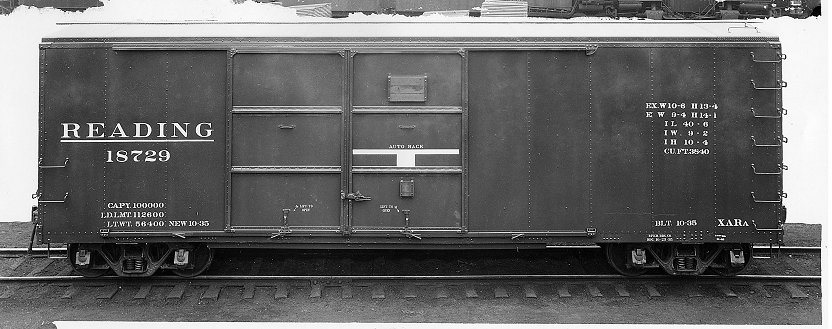
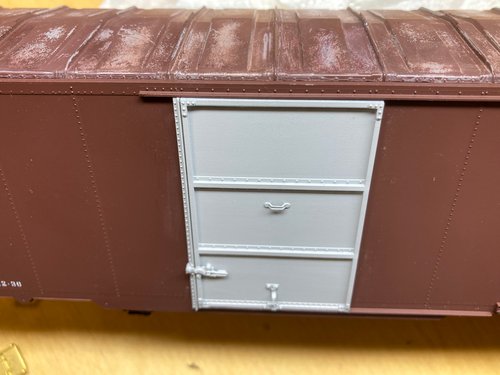
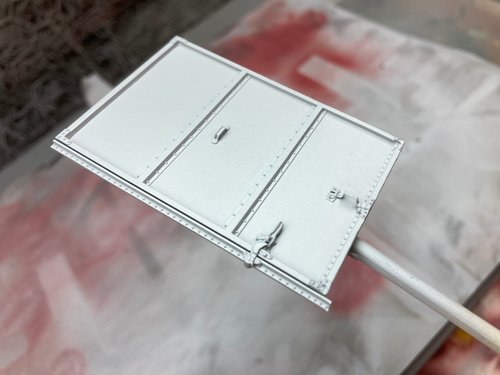
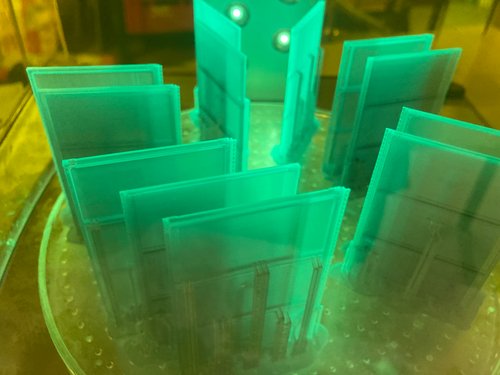
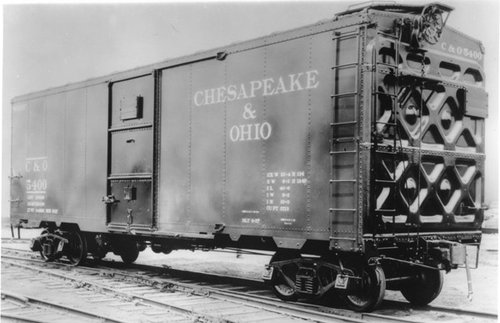

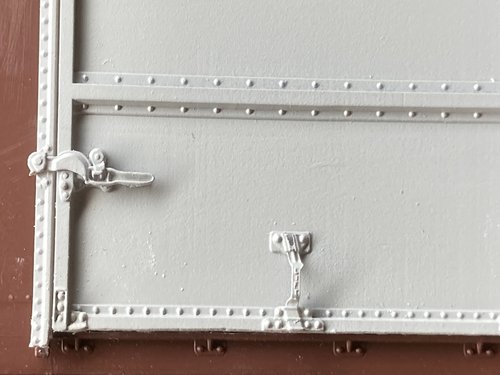
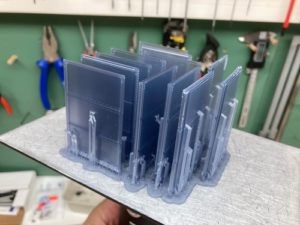
3 Panel Creco Door in 3 variants complete with corresponding hardware to outfit your Intermountain kit.
Viking Corrugated All Steal Roof
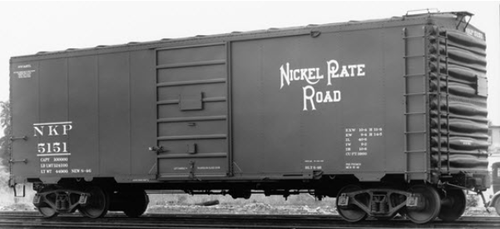
This distinctive roof built by the Standard Railway Equipment Manufacturing Company could be found on cars of the C&O, Nickel Plate Road, Erie and Norfolk Southern. the model is designed to be printed out in two pieces and relacing the Murphy roof that comes with the kit. The two parts fit so good that you can hardly ever see the seam. The roof walk can then be directly attached to the printed roof. Since this is a big part please make sure that you carefully cure the halves.
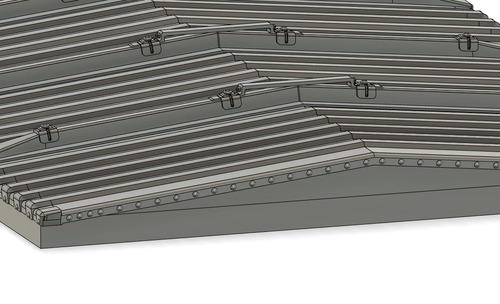
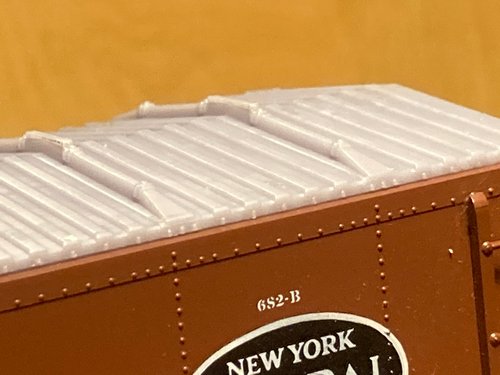
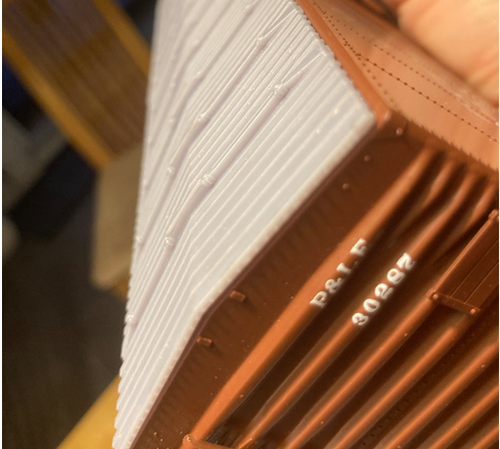
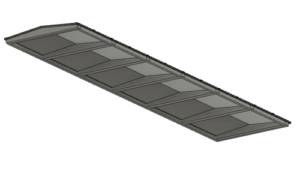
The Viking roof consists of two files for each roof half. Support bracings are in place to stiffen the design. Once glued in place the roof might benefit from light sanding with a very fine grit sanding sponge.
Car Weights & Supportive Structure
It is essential to give these cars the right weight in order to keep them on the tracks and to ensure good tracking. I use a strip of 10mm x 4mm metal that I also use in general construction. The weight sits centered and very low in the car, that’s exactly where it should be for good performance.Use the drill templates to define hole position, the screws will disappear in the car bolster. I use PLA for these parts, the prints can be tapped directly and provide a tight hold for the screws.
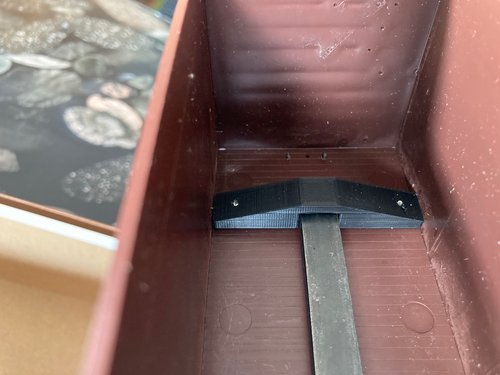
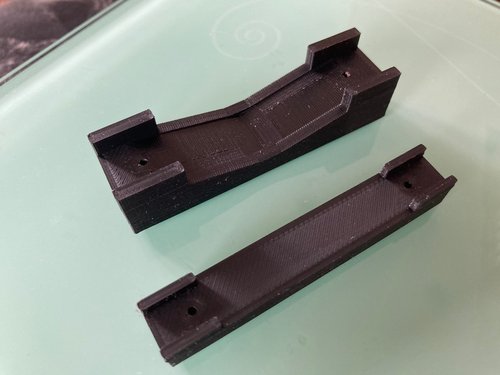
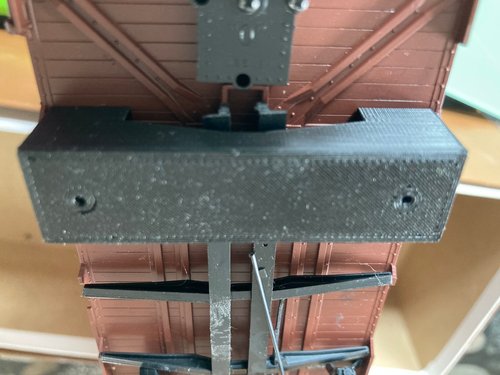
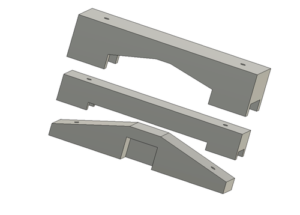
The files include two drilling templates, one fits the car bolster section before the underframe has been added. The bigger one spans over an underframe that’s already glued in place. These templates match the screw holes of the weight holder above.

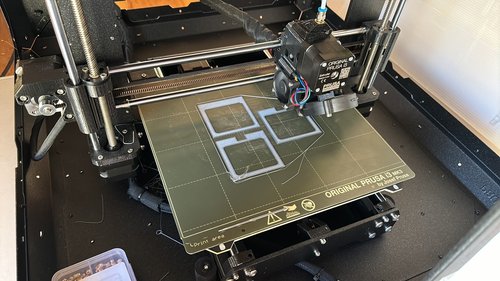

This variant of the weight holder also functions as a stiffening element to help you install the roof and to keep the shape of the car sides. Epoxy gued in place, they also can hold the car weights. The end pieces are best screwed from underneath the bolster for maximum durability. Drilling templates included.
What's up next?
